Smart Overlays are data-driven graphics that can be automatically applied to product images based on product information. This is achieved by defining one element of Product Data with Asset Metadata of assets stored in a specific Tweak Collection.
When editing product images or Campaigns Images, Smart Overlays can be set up on single or multiple product images. Smart Overlays can be applied on any image in the Product Page but only on the featured image in Campaigns.
Typical uses of Smart Overlays include Brand Logos or product features like Organic, Recycled, Warranty etc.
To manage Smart Overlays:
1. Click on the Bag icon on the left hand panel.
2. Click on Settings at the top of the page.
3. Scroll down to Smart Overlay. Click on +.

4. Creating your Smart Overlay criteria.
Only Store Admins can edit Smart Overlays.
Title: Create a name for the Overlay
Product Property Product Metadata that the system will match with the Asset Property. Available options Product Title, Product Description, Product Category, Product Type, Tags and Vendor.
Asset Property Asset Metadata that the system will match with the Product Property. Available options are: Asset Title, Category, Copyright Notice, Tags and Custom Metadata - Text type.
Tweak Collection Tweak Collections which contains the image to be placed as an overlay.
When using a Smart Overlay on images the system will automatically look for Assets stored on the defined Tweak Collection, based on the defined Asset Property match with the defined Product Property. When this data matches, the image from the collection will be applied as an overlay on the product image.
Smart Overlays are saved by clicking on the Save
Smart Overlays can be disabled, duplicated or deleted in the Smart Overlay Settings.
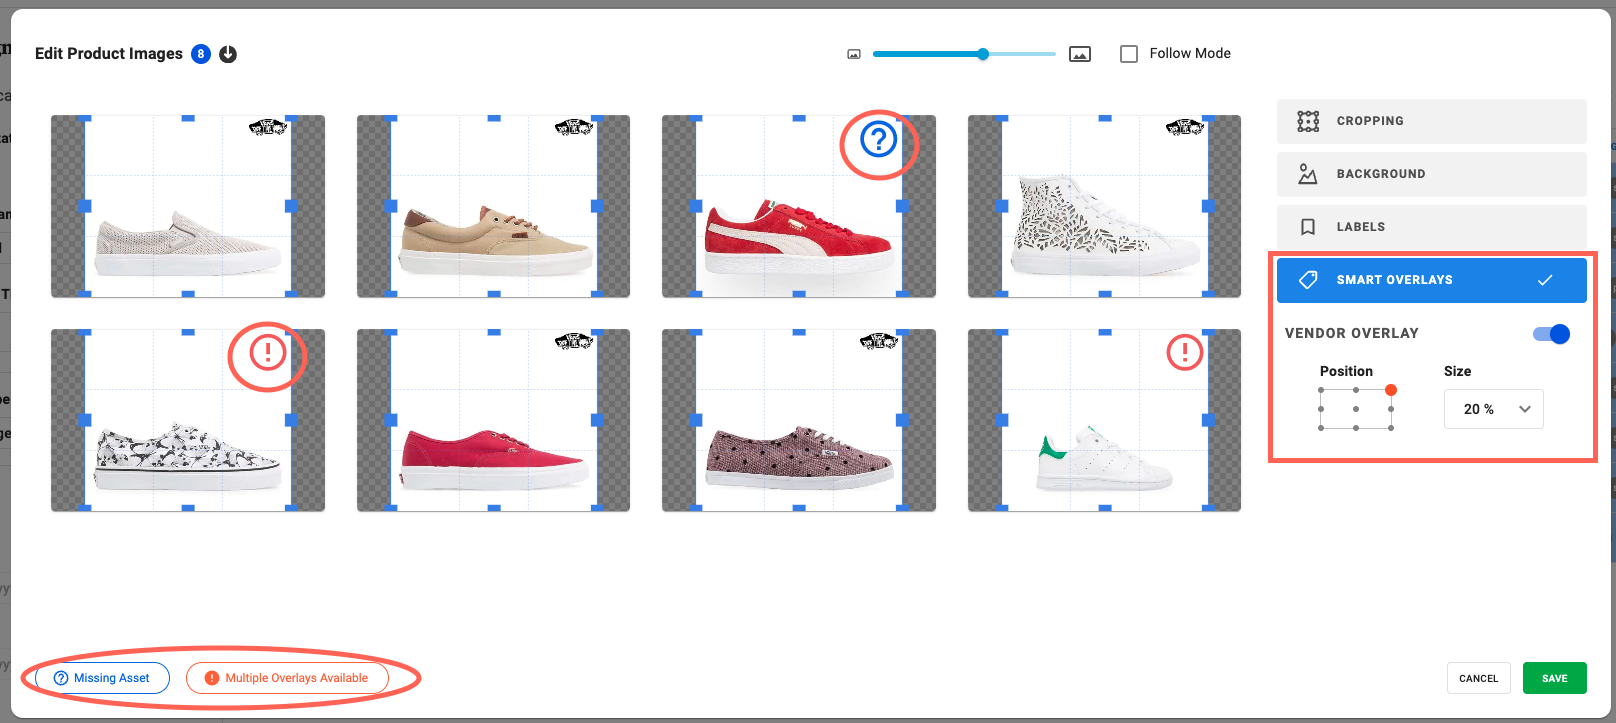
1. When editing Product Images open the Smart Overlay tab.
2. All available Smart Overlays are displayed, enabling selection of the overlay required.
3. Select position and size.
In cases where Multiple Overlays are available, you are asked to resolve the conflict individually for each of the images by clicking on the Exclamation icon.
If no overlay image matches the criteria set, an Interrogation icon will appear..