Managing product data is a crucial aspect of utilizing the Merchandiser Studio app, it offers robust tools and functionalities specifically designed to assist you in organizing and updating your product information.
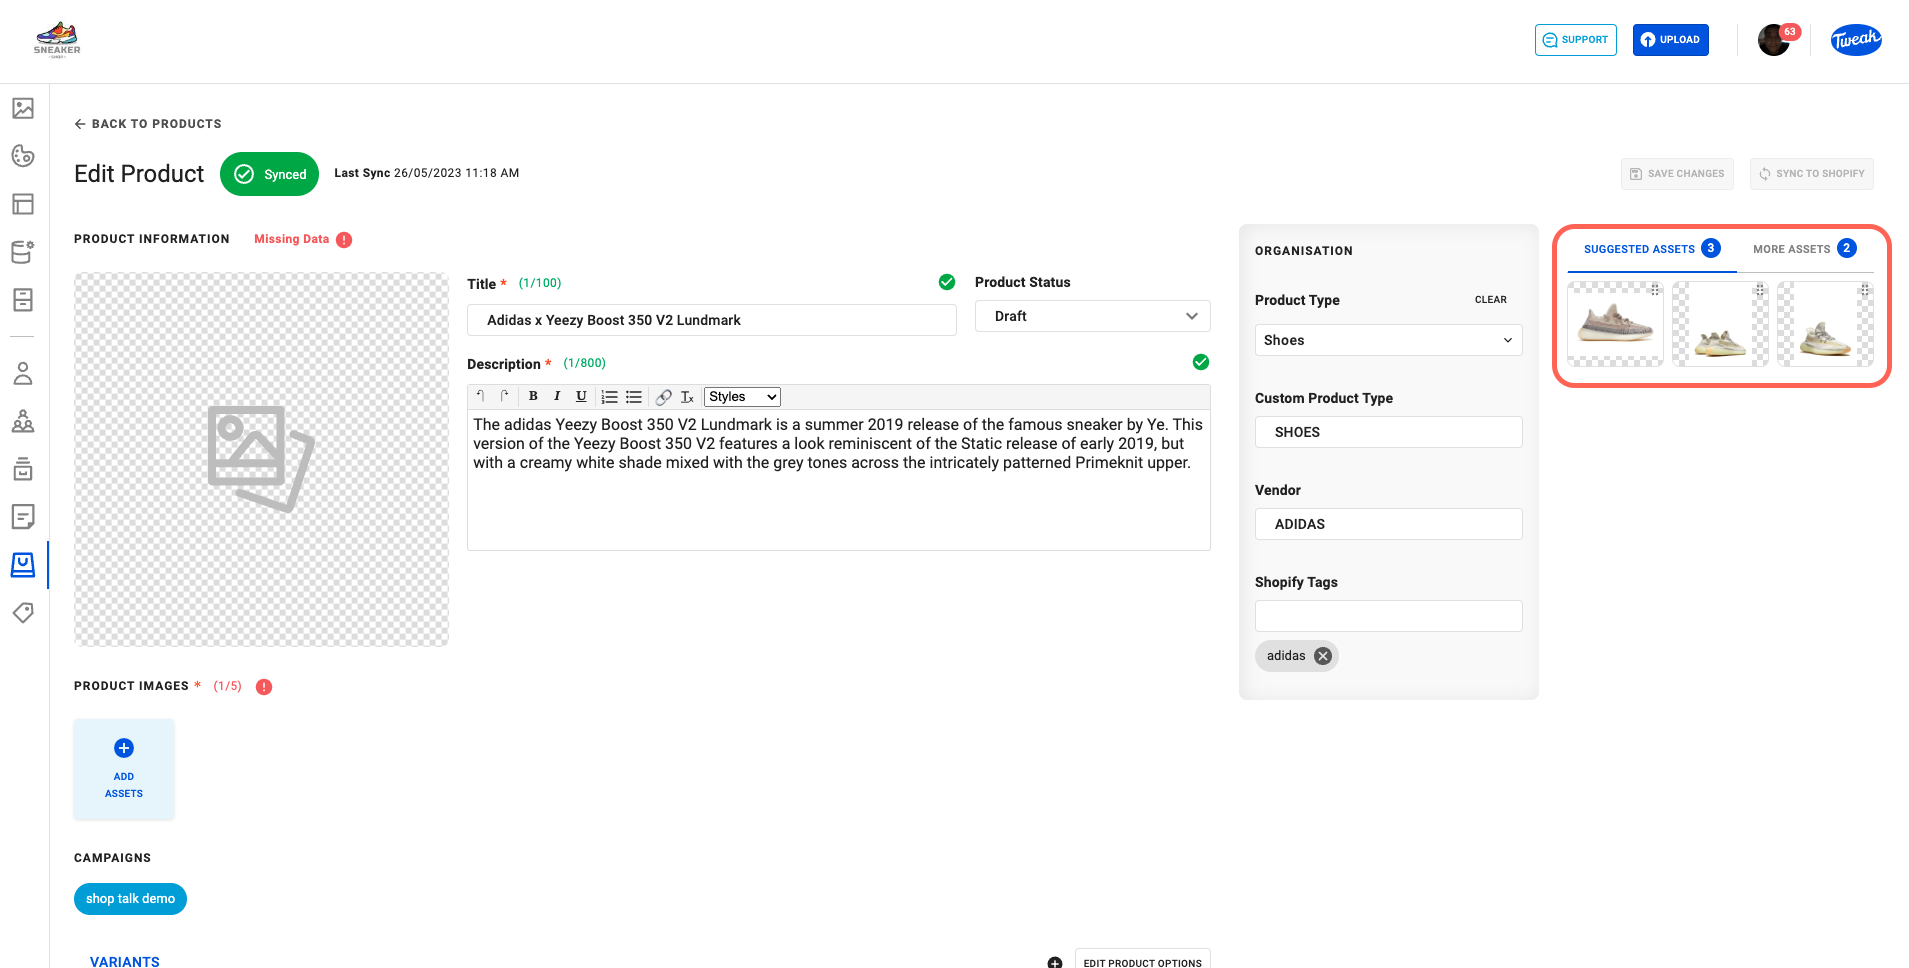
Editing product metadata enables you to modify and update important information associated with your products. Product metadata includes details such as product titles, descriptions, product status, organization fields(product category, product type, vendor, Shopify tags), price, compare at price, cost, SKU, barcode, tax, shipping(weight, unit, HS Code)and products and variants images. The action of editing products can be done on the product page or on the Data View.
On the product page any change done on a product it’s only save when clicking on the Save Changes button.
1. Start by navigating to the product you want to edit.
2. Review the existing metadata associated with the product and identify the specific information you wish to edit.
3. Make sure you click on the Save Changes button after changes.

Images uploaded at the highest resolution in the DAM will be automatically resized when added to a product and synced to your Shopify store. This doesn’t impact the original, which always remains at the highest resolution.
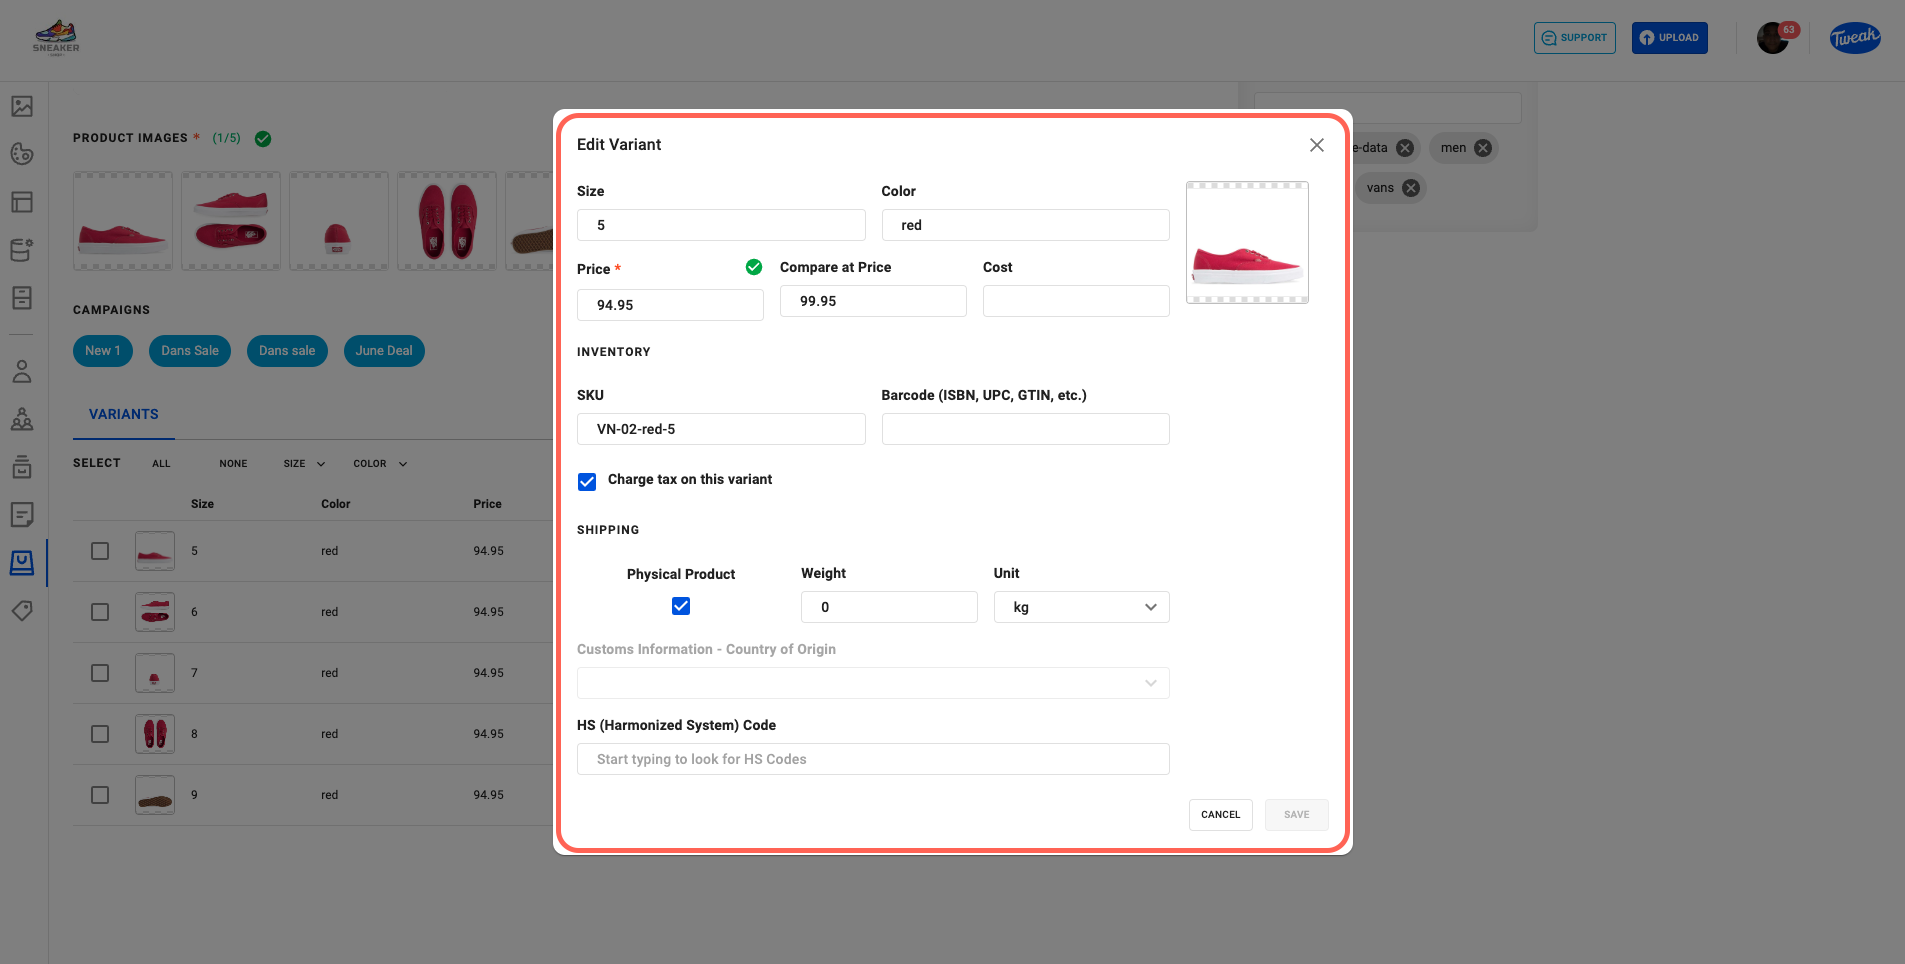
Editing product variants is a process that allows you to make adjustments to variant-specific information such as pricing, SKU, Barcode, tax, shipping information and image variant. The action of editing products Variant data can be done on the product page and on the data view.
1. Start by navigating to the product that contains the variant you want to edit.
2. Scroll down to the variants sections and click on the pen icon to edit its information.
3. On the Edit Variants page you should be able to edit all the variants available data.
Make sure you click on the Save button after changes.
To delete product variants click on the Minus icon beside the pen icon on the Variants section.
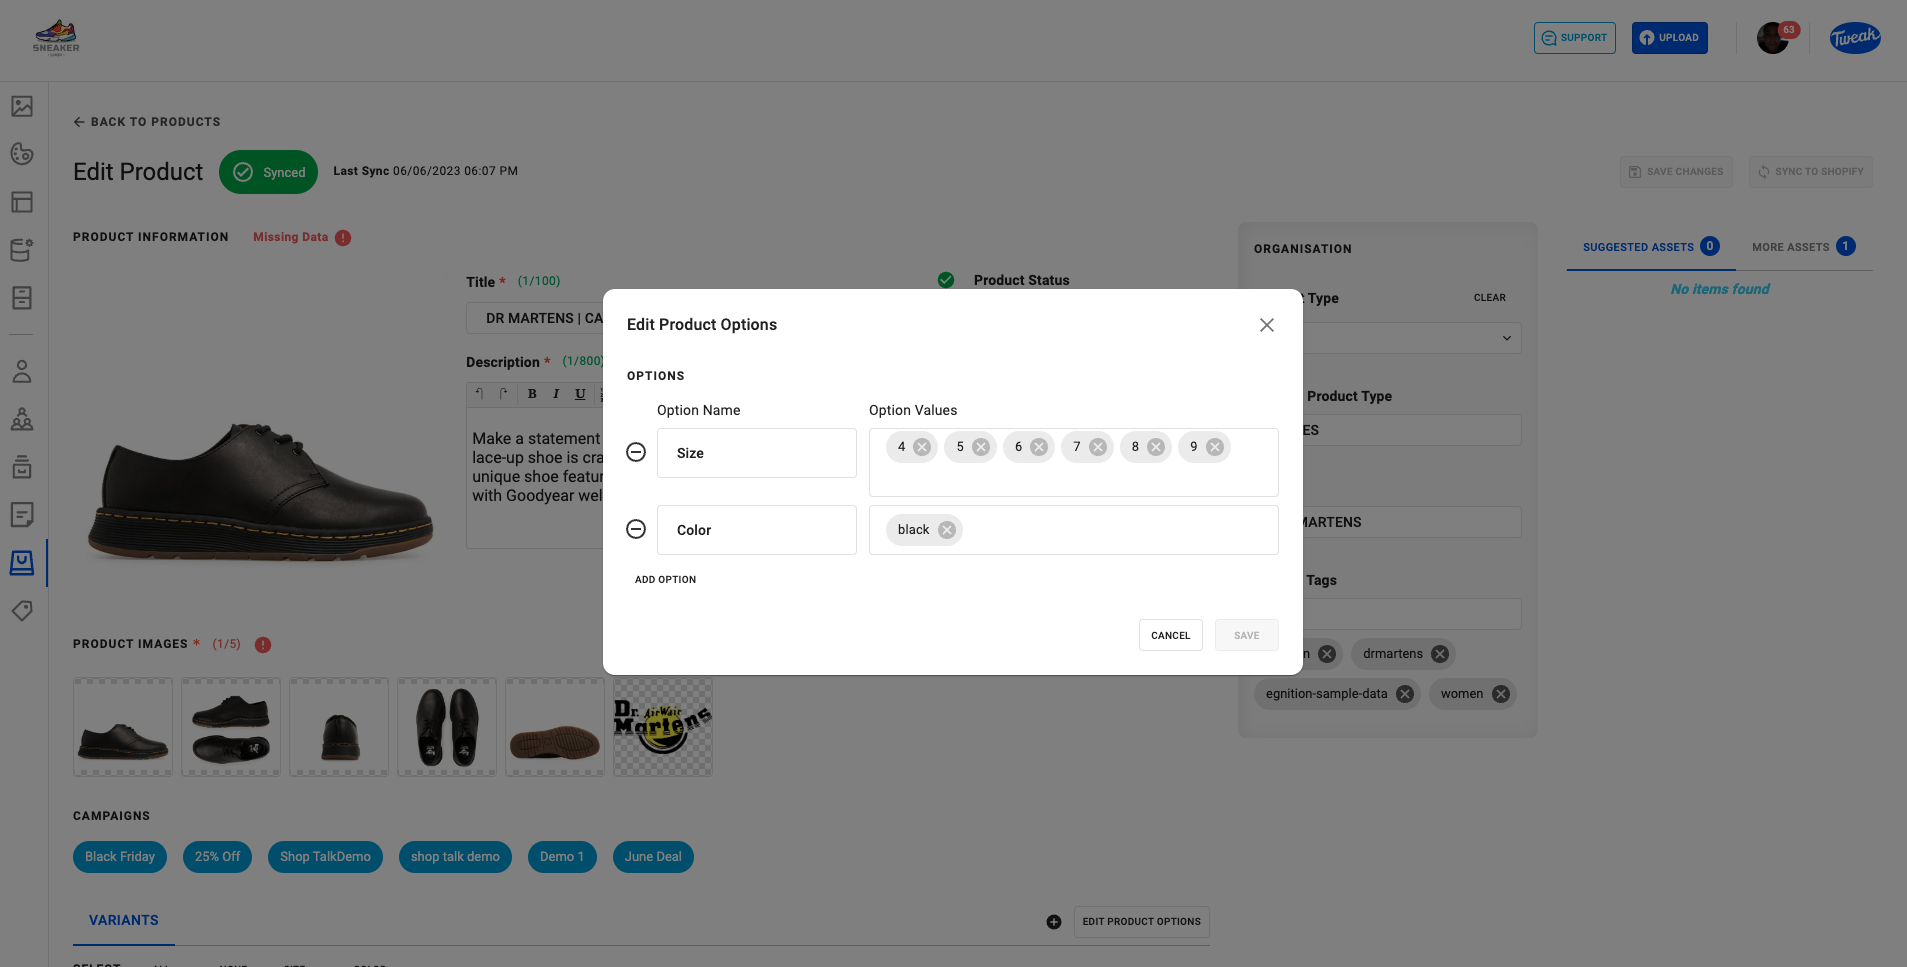
To manage variants of products:
1. Start by navigating to the product you want to manage variants.
2. Scroll down and click on the Edit Product Options button.
3. Clicking on the Add Options and fill the Option Name and Values to create new Variants.
4. Clicking on the x on the Options Values to remove variants.
5. Clicking on the Minus icon you will be removing the product option.
6. For products that contain Options by clicking on the + button beside the Edit Product Options button allows you to create new Variants.
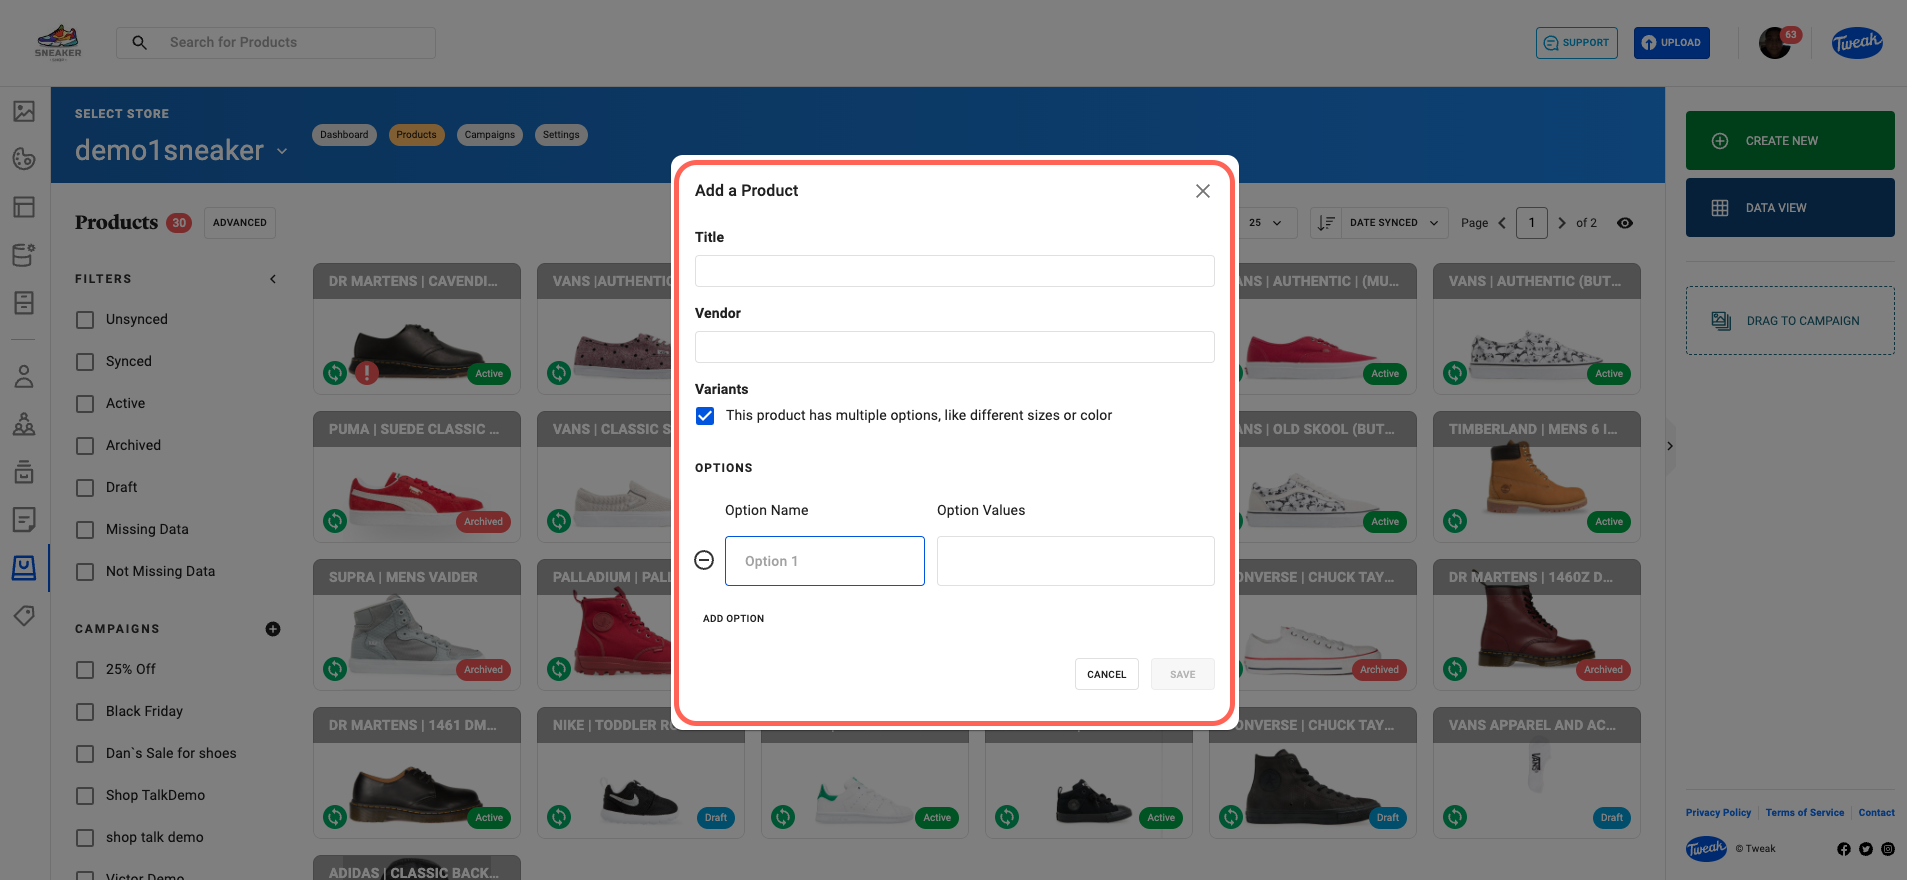
To create a new product:
1. Click on the Bag icon on the left hand panel.
2. Click on Products at the top of the page.
3. Click on Create New on the right hand side panel.
4. You now will be asked to fill the Product Title and Vendor, if the new product contains Variants, mark and fill the Options Name and Values. Click on Add Options if you wish to add more Options.
5. Click on Save.
The Suggested Assets consists of assets that have metadata matching the SKU or barcode of the product being viewed. This means that the assets in this category are specifically related to the product in being viewed. They are suggested based on their association with the product’s unique identifiers, providing a streamlined and relevant asset selection process.
The More Assets consists of assets that have metadata matching the product organization fields such as Product Category, Product Type, Vendor or Tags. These assets are not directly linked to specific products but are related to broader product categorization and organization. The More Assets category offers a wider range of assets that can be useful for various purposes beyond the direct product association.
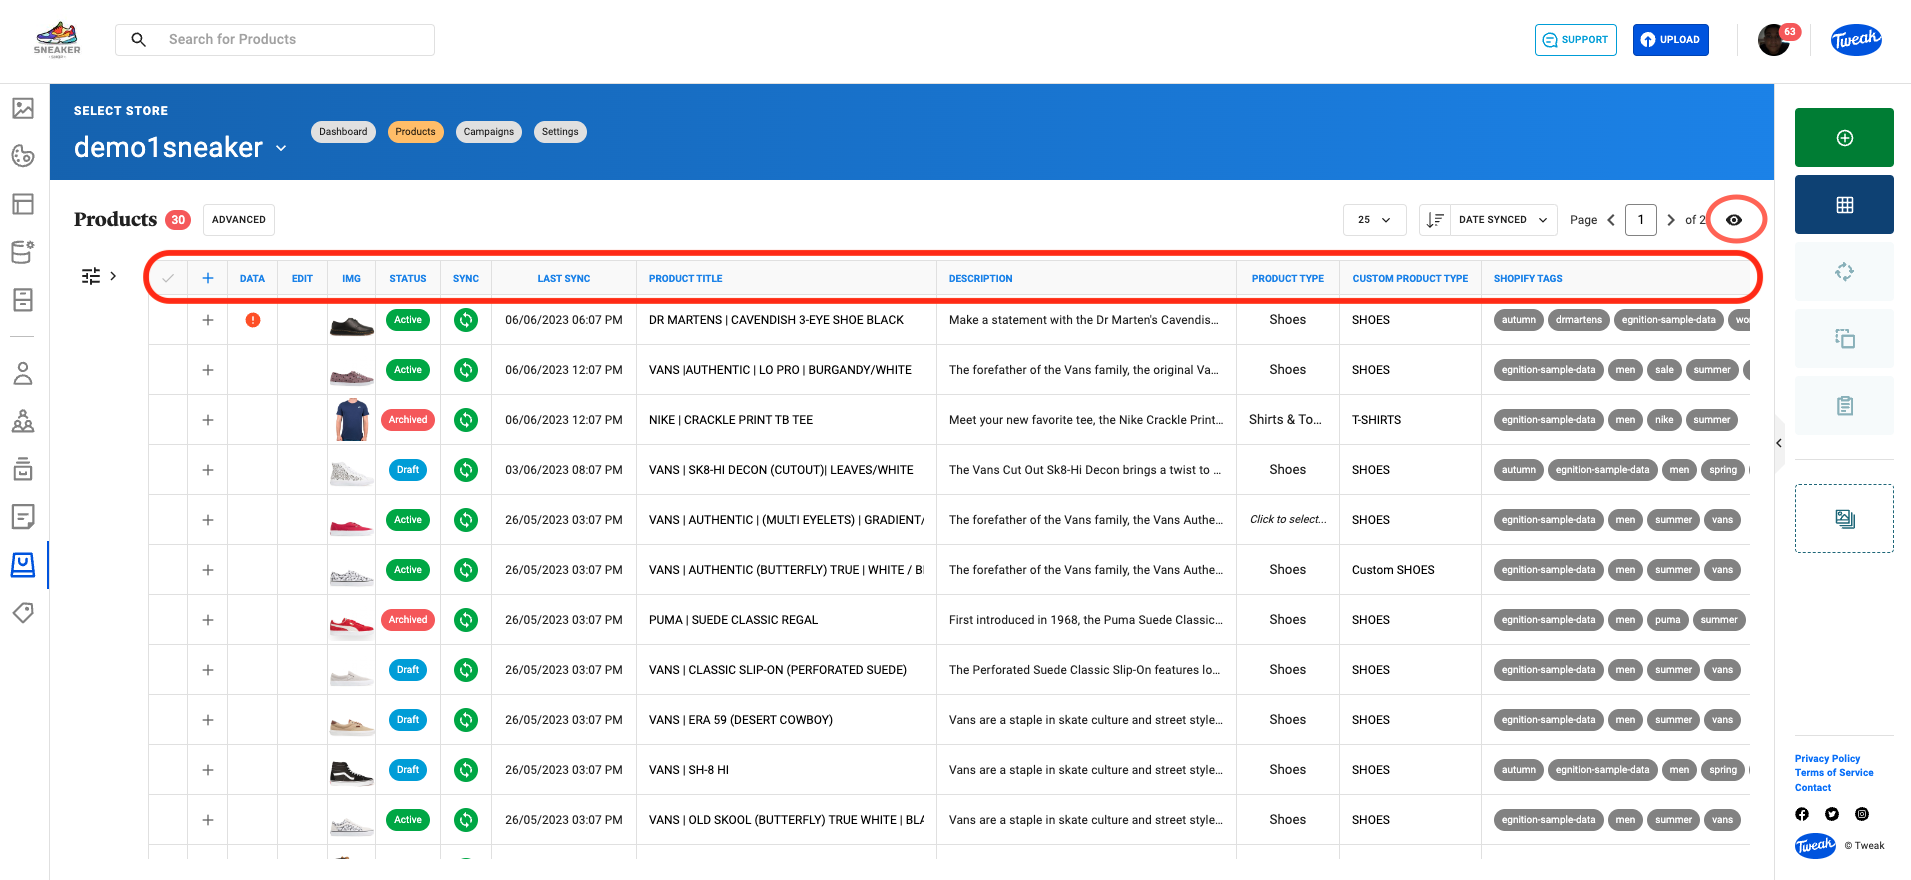
Data View shows product metadata allowing edits to be made quickly to individual products or multiple products, there’re also data tools such as sync and copy and paste. Any edits made to the product are saved automatically but will be in unsynced mode until synced to the Shopify store.
The data displayed on the Data view can be hidden and rearranged by clicking on the Eye icon on the top right on the page.
1. Click on the Bag icon on the left hand panel.
2. Click on Products at the top of the page.
3. Click on Data View on the right hand side panel.
4. Click on the + to see all the products Variants information.
Using Copy and Paste allows the copy of specific fields from one product to another.
1. On the Data View page select the product to be copied. It should highlight this product in green.
2. Click on Copy on the right hand side panel.
3. Find the destination products and select them.
4. Click on Paste on the right hand side panel.
5. On the Paste panel, select the product data you wish to Copy and Paste.
6. Click on the Paste button.

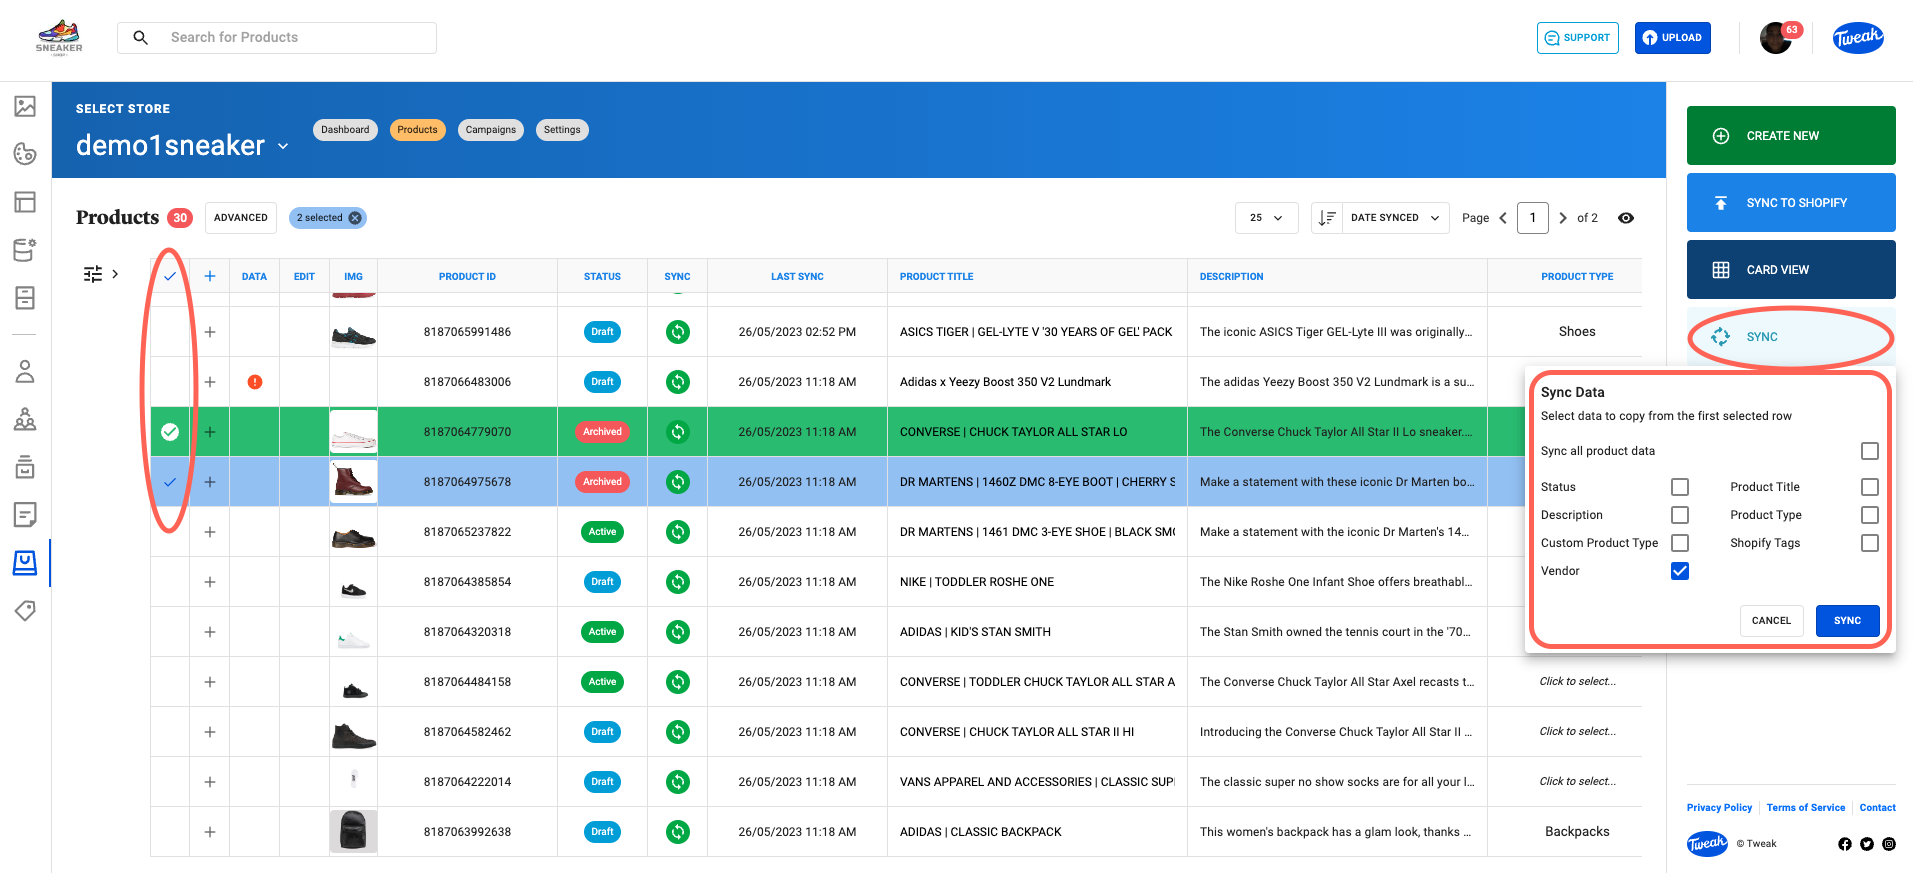
Using the Sync tool enables you to synchronize different Products fields to be the same as the lead product.
1. On the Data View page, select the products to be synchronized. The lead product it’s the first selected that will be highlighted in green.
2. Click on Sync on the right hand side panel.
3. On the opened Sync Data panel, select the Product data you wish to sync.
4. Click on the Sync button on the Sync Data panel.