1- Open a single image or selection of images. (max 50) from the home page and click Transform.
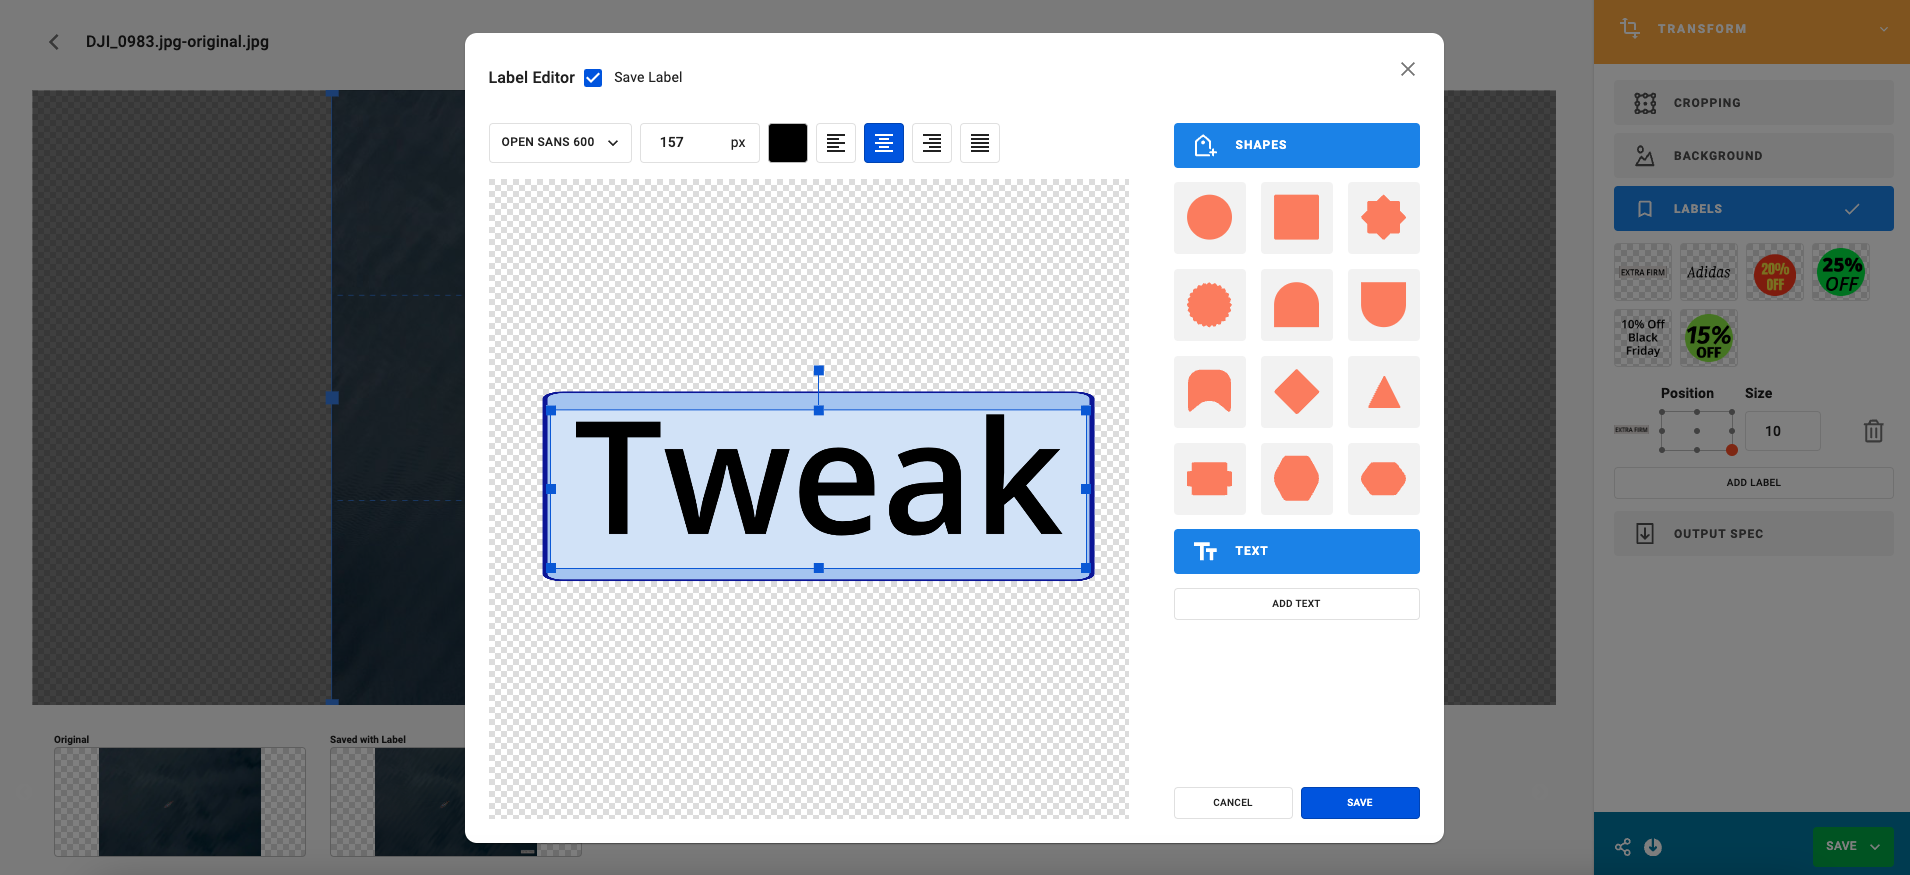
2- Click on Label, then Add Label.
3- Select a Shape for the label if you wish to use one
4- Click on the left hand colour box and select a hex number or use the picker for the fill color
5- Enter a stroke width if you wish to add a stroke. The stroke color can be selected from the right hand box.
6- For text on the label, select the Font, Size in Pixels, Color and Alignment
7- Click on Save when your label is ready.
8- The label will now appear on your image/s. Use the location selection to change the placement of the label and select the size you wish it to appear on the image/s. The label will be saved to use again.
9- To save your work.
Download using the downward arrow key.
Share by email using the share button.
Save as a New Asset using the green save button.
Save as a New version of the existing asset using the green Save button, when saving as a New Version it the saved version will become the Master.
Save as a New Transformation, which saves a single asset in the Transform Tool, with an option to embed the link for sharing.